 Skip to content

1.How to Register and Update Autel MK908?
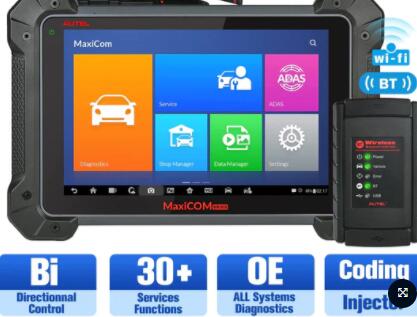
Dear friends, Autel MaxiCOM MK908 in the automotive market is the next generation of Autel MaxiSys MS908 (Global Version, No IP Limit), it has powerful and high quality performance. With ECU Coding Bi-Directional All System Diagnoses, Autel MK908 supports full OBD diagnostic function and a lot of special functions.
It's available in multiple languages and can be changed to another language freely depends on your need. If you want to register and update Autel MK908. Please read the guide to register and update it for your first time to use. Autel Maxisys Scanner Store
Autel MK908 register:
First, you can click “Update” or other functions on the main menu to enter registration page. And then you can go to the next procedure.
It will prompt you to register the product if this is your first time to use and have not registered. If you have not registered before, you need to create your Autel ID.
Press “Register” to continue to create an Autel ID firstly. I suggest you use your email as your account.
Enter Email, password and verification code which can be got from the email, and click “Sign up”.Then you will have your own Autel ID.
Now the ID account has been created, you also need to register your MK908 with the serial number. It is important for your following usage of your Autel service.
Now click “Register” to continue
The serial number and password will be input automatically, just click “Register” and wait until the process is done. Now you have finished the registered process.
Autel MK908 update:
If you want to have better using experience. You can update autel scanner pro MaxiCOM MK908 online for free for one year once you purchased. After the free period, you need to buy the extra software update service so that you can update normally.
Note:
1.It will need 1-3 days for the AUTEL technician to do the update service. You need to wait for it.
2.Very easy to operate, no shipping needed. It can be finished online.
How to make it work?
1.After you place an order on our website and check out, please provide us your device serial number. It is important for you to open one year update authorization.
2.We will open one year update authorization for you.
3.The Autel technician will open the update service Every Tuesday and Thursday.
4.Once the update authorization has been got, and you can go to download the newest update from tablet directly. Then you can use the newest software.
Path: Select “Update” to enter the update page and select the software you need to update directly. That is all the related information here. Hope it helps.
2.[ROM Download] Custom Rom for Tronsmart MK908, fit for all version.
Dear friends, here the article will show you the way to make custom rom for tronsmart MK908, fit for all version.This rom has been made by BOB Finless one week ago, but I miss it, so late to post here. All credit to BOB Finless.
Here is the custom rom change log:
Firts, I put back the AOSP Android launcher.
1)The first thing is to rooted and new SU and Superuser applied that supports Android 4.2.2.
2) After you finished the task of rooting and the new SU and Superuser applied , then stock ROM was only 2 Gig of APP space.
But you also have parameter file options! It is important for the following procedure.
There are also 1gb, 2gb, 4gb and 6gb options.
Read below for how to change that in the flash tool. It can give you great support for the debloated of junk APPs and Google Apps .It can also make the great using experience.
Realize if you use this 6gb option, internal SDcard will only have about 600 megs of free space! It can give you more using experience of free space.
3) Debloated of junk APPs and Google Apps you can get from Google Play.
I also updated Google Play and required Google APPs to the latest version. Because it gives your more tech support.
4) As always, full in it. then it can support! If you do not know what that is… ignore it. For geeks that want to use it. It is there! It also make sure you can have better service and high quality performance.
5) I re-enabled location services. It supports the useful location service. This is now in the settings menu.
Tested and working with all APPs that use it.
Remember to turn off GPS as we have no GPS.
6) I also re-enabled accessibility options in settings.
7) Gameloft fix. It enables us to make more performance improvement.
8) Build.prop edit to open up the Google Play store to APPs that normally say “not compatible”. It can solved the problem quickly.
I am spoofing a Samsung device that will show almost any APP as compatible. So that you can have great device using experience.
Your device will show up in Google play as Samsung device nopt a MK908 or RKSDK! Understand this please.
I also left the original build.prop in the ROM called build.orig.
If you want to go back, just use ES FIle Explorer or a root file explorer and rename build.prop to build.old. Then you can experience the newest experience.
Then rename build.orig to build.prop.
Go into settings, apps, all and go into the Google Play app. Clear the cache and data. It is important for the procedure of reboot process.
Reboot! You should be back to showing up as a 908ii.
WARNING if you do this, you need to be using the 1080 kernel or your screen will be oversized!
9) I added a reboot APP that will allow optional reboot options like reboot to bootloader (flash mode). It can make you have the most use of our product.
10) I provide the stock kernel but it does have the micro frame skipping issue!
BUT I have also created Vsync patched kernels that fix the micro frame skipping! Now it is the setting of the flash tool.
I have set the flash tool to use a 720P vsync kernel by default.
11) 1080P Kernel if you want it!
I also created a stock 1080 kernel (has frame skipping) as well as a vsync patched 1080 kernel.
See instructions below for how to choose the correct boot.img and kernel.img
720P boot and kernel is the default setup in my flash tool.
12) By request I added TUN.KO for VPN support. It was not in the kernel by default. That is all the related information here. Hope it helps.
3.Tronsmart MK908 Firmware Upgrade Guide
Dear friends, here the article is going to show you the way of tronsmart MK908 firmware upgrade guide. Now take a video for how to update the firmware, see here:
http://www.youtube.com/watch?v=UzLWzL6jod4 . Ok, guys, this is the step by step instruction for how to flash stock firmware in Tronsmart MK908; Pease follow it carefully.
Flashing the Firmware
- Please download the stock firmware you want to flash here
http://blog.geekbuying.com/index.php/category/android-tv-stick-tv-box/tronsmart-t428/
flash tool download link:
http://www.mediafire.com/download.php?b9ckxat6t4cw5qc
Password: GEEKBUYING.COM
Drivers you might need can download here
http://www.mediafire.com/download.php?yqxz3wnqi2hpmcm - Unzip the flash tool to your desktop or other convenient location and locate the folder RKBatchTool1.6 – inside this folder is the flash tool program RKBatchTool and the USB drivers for the Tronsmart MK908– Don’t open anything yet!
- Unzip the stock firmware you just download, and you will get a file named: Update_MK908_100j1101_6210.img or similar, this is the actual firmware file. It is important for the following procedure.
- Next you need your Tronsmart MK908 and the micro USB – standard USB cable that came with the device. You also need a small metal stick, a paperclip or sim removal tool like the one that comes with the iPhone is actually perfect.
- See the pictures below. You need to locate the small push button switch which show in the photos ( same with MK808)
- The idea here is that you need to use the metal stick to press the push button switch and whilst holding it in connect the Micro USB cable to the computer. This can be tricky to do as we only have one pair of hands! but with a bit of practice it becomes easy. I recommend first getting a feel for where the micro switch is and practice pressing the button in a few times before trying to connect to the PC as well. The micro switch should “click” noticeably when depressed.
- When you have successfully connected your Tronsmart MK908 to the computer you should hear a sound from windows telling you that a new device has been found. You can release the recovery button now. You can have the new device usage.
- The next bit is important… we don’t want windows to try and automatically install any drivers as we want to select the ones from the RKBatchTool1.6 folder.
- Depending on which windows version you have the next bit will be different. In an ideal world the install driver dialog will appear as shown in the picture below.
- You need to select the option “install from a list or specific location (Advanced).After the process, you can make the selection of the option.
- At the next step you need to check the option “include this location in the search” and then browse to the folder: RKBatchTool1.6/RockusbDriver
- Click Next, and the driver should install. You will get a message to tell you the driver installation has been successful – or not!
PLEASE NOTE – If it didn’t work or Windows automatically installed a driver you will need to completely remove the driver from the system and start over. To do this varies between systems but basically you will need to locate the device manager on your PC and find a USB device called “MK908″ and completely remove and delete the driver from the system. - If the driver installation is successful you can then proceed to the firmware installation!You should make sure the procedure of the firmware installation be finished successfully.
- Open the program RKBatchTool and the tool will open. Then it is the important for the following procedure.
- At the top right of the RKBatchTool Window you will see a file selector, click on this and select your Firmware file in this case: Update_MK908_100j1101_6210.img
- If your Tronsmart MK908 is correctly connected to the PC, the RKBatchTool program will show a green square with “1″ on it. If not then you need to go back and make sure the USB driver is installed correctly.
- Click on “Restore” to install the firmware! Then it is the procedure of the installation.
- The program will give an indication of what its doing with a progress percentage shown below, when its finished you will get a message like upgrade done success.Then you finish all the procedure.
That is all the related information here. Hope it helps.
4.Autel MK908 VCI Connection Tips
Dear friends, here the article will show you how to do VCI Connection with Autel MK908 Diagnostic Tool.
After the VCI device is properly connected to the vehicle, the Power LED on the VCI device illuminates solid green light, now it also provides you more tech support. And is ready to establish communication with the MaxiCOM MK908 display tablet.
The Wireless Diagnostic Interface, which comes with the MaxiCOM tool kit, supports 2 communication methods with the MaxiCOM display tablet: BT and USB. It is important for the following procedure.
The J2534 ECU Programming Device, which comes with the MaxiCOM Pro tool kit, supports 2 communication methods with the MaxiCOM display tablet: BT, and USB.
First Main Step: Pairing Up via BT
Among all methods, BT pairing is recommended as the first choice for the25 communication between the MaxiCOM display tablet and the VCI device. The working range for BT communication is about 210 feet (70 m); this means you can perform vehicle diagnosis freely around the workshop with greater convenience.
If you use more than one VCI device to connect to the test vehicles when customers are many, you can perform vehicle diagnosis on various vehicles conveniently, by pairing the MaxiCOM display tablet separately to each of the VCI devices connected to the different test vehicles, via BT, without the need to repeat the plugging and unplugging procedure, which is unavoidable through traditional wired connection, thus saves you more time and provides more efficiency.
You need to pair up the MaxiCOM display tablet with the VCI device via BT:
- If not already done, power up the MaxiCOM display tablet. It can make sure your product have the power to perform efficiently.
- Select the VCI Manager application from the MaxiCOM Job Menu. Then it is time for the application of the VCI manager.
- When the VCI Manager application is opened, the device automatically starts scanning for available VCI devices around for BT pairing. The found devices are listed in the Setting section on the right side of the screen.
- Depending on the VCI type you use, the device name may display as Maxi suffixed with a serial number. Select the required device for pairing. Then it is the usage of VCI type.
- When paring is successfully done, the connection status displayed to the right of the device, the name is shown as Paired. After you have successfully do that, you can make the process of he VCI button on the system.
- Wait for a few seconds and the VCI button on the system. The navigation bar at the bottom of the screen shall display a green tick icon, indicating the display tablet is connected to the VCI device, and is ready to perform vehicle diagnosis.
Important message:
If no VCI device is found, this may indicate that the signal strength of the transmitter is too weak to be detected. In this case try to get closer to the device, or reposition the VCI device, and remove all possible objects that causes signal interference. When these are done, tap the Scan button at the top right corner to start searching again
Second Main Step: USB Cable Connection
The USB cable connection is a simple and quick way to establish26 communication between the MaxiCOM display tablet and the VCI device. After properly connecting the USB cable from the tablet to the VCI device, the VCI navigation button at the bottom bar of the screen shows a green tick icon in a few seconds, and the USB LED on the VCI device illuminates solid green light, indicating the connection between the devices is successful.
Keep this in mind:
Since the USB connection provides the most stable and fastest communication, it is highly recommended to apply this communication method when operating ECU programming or coding. When all the two communication methods are applied at the same time, the MaxiCOM MK908 system will use USB communication as the default priority
The Autel MK908 diagnostic platform is now ready to perform vehicle diagnosis. That is all the related information here. Hope it helps. You may also like Autel Drone